Posted on

How to Order Printing Online Without Missing an Important Specification

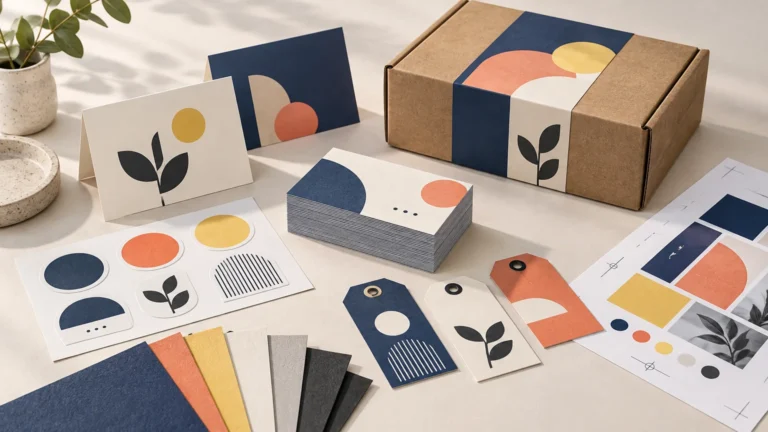
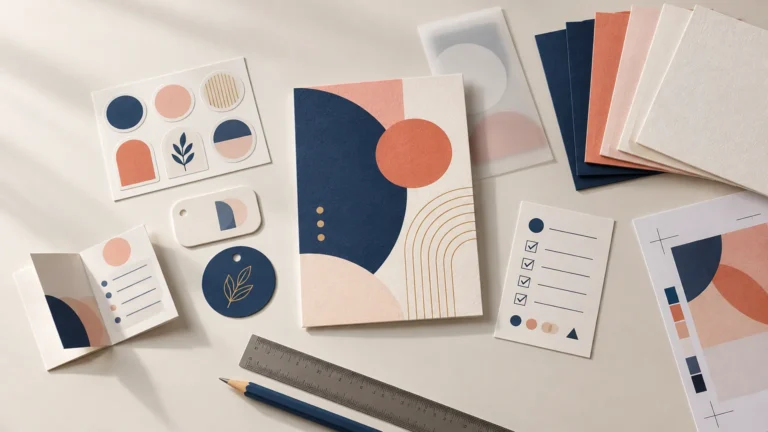
Overhead view of coordinated printed stationery and packaging samples in navy, coral, blush, cream, and gold, including a central geometric card, sticker sheet, tags, checklist-style proof cards, paper swatches, a ruler, and a pencil.

TLDR

The safest way to order printing online is to define the finished piece before opening a product menu. Write down its final size, quantity, material, printed sides, finish, artwork requirements, proofing method, delivery deadline, and total budget. Compare vendors using the same specifications, then review a digital proof and order a physical sample or small test run whenever color, texture, adhesive performance, package fit, or timing carries meaningful risk.

Learning how to order printing online is less about memorizing technical language and more about making decisions in the right sequence. Start with what the printed piece must accomplish, translate that purpose into physical specifications, and only then compare products and prices.

A polished result depends on the complete system: design, dimensions, substrate, finish, production method, proof, shipping, and final use. A beautiful file cannot compensate for the wrong stock, and a low unit price is not a bargain if rush shipping, setup choices, or an unsuitable finish undermine the project.

Begin with a one-paragraph print brief

Before choosing a printer, describe the job in plain language. Identify the audience, purpose, environment, handling conditions, desired impression, quantity, and required arrival date. This keeps you from accepting a product-menu default simply because it is convenient.

For example: “We need 500 double-sided appointment cards for a wellness studio. They should feel calm and substantial, remain easy to write on, fit a standard cardholder, and arrive at least five business days before opening.” That brief immediately favors a writable, relatively sturdy stock and makes an arrival buffer part of the specification.

Ask these questions before requesting prices:

  • What must the piece communicate or help someone do?
  • Will it be mailed, handled repeatedly, applied to a surface, displayed outdoors, or placed inside packaging?
  • Does anyone need to write, stamp, fold, scan, peel, or assemble it?
  • What is the final trim size, orientation, page count, fold, or cut shape?
  • How many finished pieces are needed, including extras for damage, samples, or late additions?
  • What date must the shipment physically arrive—not merely leave production?

How to order printing online by specifying the finished piece

Choose dimensions according to the finished use. A folded brochure is ordered by its flat and folded dimensions; a booklet needs a finished page size and page count; a sticker needs both artwork dimensions and a cut shape. Confirm orientation, printed sides, folds, binding, corner treatments, holes, perforations, and any variable information.

Quantity also affects more than price. Order enough for the planned distribution plus a sensible project-specific allowance, but avoid buying a large surplus of pieces carrying dates, prices, staff details, or QR destinations that may change. For a first production run, flexibility can be more valuable than the lowest possible unit cost.

If the project is still at the artwork stage, use this guide to preparing artwork for custom printing to resolve common file issues before uploading it.

Match the material and finish to the job

Paper weight alone does not describe how a piece will look or behave. Coating, stiffness, opacity, texture, grain, and finish all influence the result. FedEx’s paper guide describes coated paper as a useful choice when image detail and crisp color matter, while more absorbent uncoated paper suits applications such as stationery and envelopes. It also notes that heavier stocks are generally thicker and stiffer.

Option Useful for What it tends to emphasize Check before ordering
Coated paper Brochures, flyers, image-led cards Sharp imagery and saturated-looking color Whether writing or stamping is required
Uncoated paper Letterhead, note cards, forms, envelopes Tactile paper character and writability Ink absorption, show-through, and desired texture
Heavy card stock Invitations, premium cards, inserts Rigidity and a substantial hand feel Folding, mailing thickness, and printer compatibility
Vinyl or label film Stickers, product labels, seals Flexibility and resistance suited to the stated material Surface, moisture, temperature, adhesive, and removal needs
Matte finish Text-led pieces and understated designs Lower visual glare and a restrained appearance Whether colors and dark areas match the intended mood
Gloss finish Photography and high-energy promotional pieces Reflectivity and visual contrast Glare, fingerprints, and writing needs
Laminate or protective finish Frequently handled pieces and selected labels Additional surface protection and a distinct feel Edges, folds, recyclability goals, and actual exposure conditions

Material names are not perfectly standardized across vendors. Read the product description and request a sample when tactile quality matters. For labels and stickers, match the adhesive and face material to the real application rather than relying on a broad word such as “waterproof.” The relevant questions include what the label will stick to, whether the surface is curved or textured, how it will be cleaned, and whether clean removal matters.

For sticker and label projects, custom sticker and label printing provides a specialist ordering path. Before choosing a format, it can also help to consider how stickers and labels function across growing brands so the material supports the intended use.

Prepare the file for the provider you choose

A print-ready file is not merely a high-quality image saved as a PDF. It must correspond to the ordered dimensions and the printer’s production requirements. Download the provider’s current template when one is available, because bleed, safe areas, cut paths, folds, and export settings can differ by product.

Adobe’s guidance for producing print-ready PDFs recommends resolving missing fonts and low-resolution images, matching bleed and export settings to the print provider’s requirements, and using the provider’s recommended PDF settings where available. Its workflow flags images below 300 ppi as a critical issue to address.

Use this file checklist before upload:

  • Document dimensions match the ordered final size.
  • Backgrounds and edge-to-edge images extend through the required bleed.
  • Logos, text, QR codes, and other essential elements remain inside the provider’s safe area.
  • Images have adequate effective resolution at their placed size.
  • Fonts are included or handled according to the provider’s instructions.
  • Folds, cutlines, white-ink layers, spot colors, and special finishes use the requested setup.
  • The exported PDF uses the provider’s preferred preset, color handling, and page arrangement.
  • Spelling, dates, phone numbers, addresses, prices, URLs, and QR destinations have been checked independently.

Do not add crop marks or rearrange pages unless the specification asks for them. A printer may want individual pages rather than reader spreads, or a clean bleed PDF without marks. The product template and prepress instructions take priority over habits carried over from another vendor.

Know what each kind of proof can confirm

A digital proof is valuable for checking content, page order, trim position, cutlines, folds, and basic setup. It should be reviewed at high magnification and again as a complete piece. However, it cannot fully communicate paper texture, stiffness, reflectivity, real-light color appearance, adhesive behavior, or the fit of a label on a physical package.

These validation options solve different problems:

  • A digital proof checks the interpreted artwork and production layout before approval.
  • A generic sample pack helps you compare a provider’s available materials and finishes, but it does not reproduce your artwork.
  • A physical proof applies your design to a production-relevant material so you can inspect the piece itself.
  • A small custom test order lets you evaluate the design under realistic handling, application, display, or packaging conditions.

CustomStickers recommends checking a custom sticker test for real-item size, color in relevant lighting, finish, readability, QR performance, cutline, adhesion, application, and packaging fit. It distinguishes a general material sample pack from a custom test made with the buyer’s own artwork.

A physical test is especially worthwhile for an unfamiliar stock, tightly controlled brand color, small text, functional QR code, unusual die-cut shape, new adhesive application, premium invitation, or label that must fit a container precisely. If the project is expensive or public-facing, the test cost may be modest compared with replacing an unusable bulk run.

Compare complete orders, not headline prices

Two prices are comparable only when the underlying orders match. Build equivalent carts or quote requests using the same final size, quantity, material, printed sides, finish, proof option, production speed, destination, and shipping method. Then compare the full checkout total rather than the advertised starting price.

A sensible vendor evaluation also considers print quality, materials, finishing, total price, production and delivery reliability, ordering workflow, support, and policies. Those are among the factors used in PrintReviewer’s published evaluation methodology.

Record these details for each option:

  • Product subtotal and any setup, finishing, proof, or design-review charges
  • Taxes, shipping, pickup costs, and rush fees
  • Stated production window and when that window begins
  • Estimated ship date, transit method, and delivery estimate
  • Reprint, cancellation, file-correction, and late-delivery policies
  • Availability of human support before proof approval
  • Material samples or test-order options

Treat production and shipping as separate stages. Some providers begin production only after proof approval; PrintInvitations, for example, states that orders include a digital proof and that production timing begins after approval. It also offers physical proofs or samples as provider-specific options. Build time into the schedule for file review, revisions, proof approval, production, transit, inspection, and a contingency before the event or launch.

Choose an ordering path that fits the risk

A self-service document printer is often suitable for straightforward handouts, reports, manuals, and other standard pieces, particularly when local pickup is useful. FedEx Office describes an online workflow that includes file upload, product and paper choices, finishing, checkout, and delivery or pickup, while noting that availability and turnaround depend on the product and quantity.

A specialist is generally the clearer path when the physical behavior of the product matters. Sticker specialists are set up around cutlines, films, finishes, and adhesives. Invitation and stationery providers focus on card stocks, envelopes, coordinated suites, and proofing. Complex packaging, unusual construction, exact color programs, or elaborate finishing may justify a managed quote and prototype rather than an instant online cart.

Support matters most before approval. If a requirement is ambiguous, ask a narrow question and preserve the answer with the order: “Is this film suitable for refrigerated glass bottles with condensation?” is more useful than “Is this durable?” Never assume a feature from a product photo or category name.

Run a final pre-checkout inspection

Pause before payment or proof approval and verify the order as though someone else prepared it. Read the specifications against the brief, open the final uploaded file, and confirm the delivery plan.

  • Final dimensions, orientation, folds, pages, and cut shape are correct.
  • Quantity includes only the extras the project reasonably needs.
  • Material, color, coating, laminate, adhesive, and finishing choices match the use.
  • Artwork has the required bleed and safe-area clearance.
  • Text, numbers, dates, contact details, links, and QR codes are correct.
  • The proof represents the latest file version.
  • Production begins early enough to accommodate shipping and inspection.
  • The recipient name, delivery address, access details, and phone number are accurate.
  • There is a contingency for a critical launch, event, or mailing date.

Turn the idea into an order you can evaluate

The practical next step is simple: write a one-paragraph print brief, create one definitive specification list, and use it to build two equivalent carts or quotes. Choose on project fit, proofing, delivered cost, support, and schedule—not unit price alone.

When physical performance affects the success of the piece, test before ordering in bulk. That extra step turns online printing from a screen-based guess into a controlled production decision—and gives the finished design a much better chance of looking and working as intended.

References

  1. Choosing Types of Paper for Printing: Paper Weight Guide | FedEx
  2. Produce print-ready PDF files in InDesign | InDesign
  3. How to set a print bleed in InDesign | InDesign
  4. Low-Risk Sampling Test Orders: How To Test Custom Stickers Before Buying In Bulk – CustomStickers.com
  5. Custom Stickers | Fast & Free Shipping – CustomStickers.com
  6. Review Methodology – The Print Reviewer
  7. FAQ – PrintInvitations
  8. Copies & Custom Document Printing | FedEx Office

Posted on

How to Package a Small Art Print Series for Gifts or Online Orders

Overhead view of a coordinated art-print packaging set with stacked abstract landscape prints in clear sleeves, a gray embossed paper band, blank cards and stickers, tissue paper, and an open kraft mailer on a stone surface.

TLDR: A reliable art print series packaging system starts with a correctly sized clear sleeve, a rigid backing board, a restrained collection identifier, and one useful insert. Treat those pieces as the presentation layer, then place the completed assembly inside shipping protection suited to the order. Prototype one finished unit before buying sleeves, boards, bands, labels, or mailers in quantity.

Good art print series packaging should make the collection feel intentional without putting decoration ahead of protection. For most unframed prints, the best sequence is simple: protect the printed surface, keep the sheet flat, identify the artwork clearly, provide useful buyer information, and then prepare the complete unit for gifting or transit.

The key is to design the package as a system rather than collect attractive components one at a time. A beautiful belly band is not useful if it bows the print. A clear sleeve is not enough for postal handling. An oversized thank-you card can make an otherwise elegant package feel crowded. Every layer needs a defined job.

Separate presentation, protection, and shipping

An art print package performs three related but different functions. Presentation packaging creates the first impression. Protective packaging limits handling, surface contact, bent corners, and movement. Shipping packaging helps the complete unit withstand fulfillment and transit.

A belly band, title label, sticker seal, or thank-you card belongs mainly to the presentation layer. A sleeve and backing board protect the print during storage and handling. A rigid outer mailer, appropriately packed box, or another suitable transit enclosure forms the shipping layer.

Do not ask one component to perform all three jobs. A decorative sleeve may look finished, but it does not necessarily provide enough rigidity for shipping. Likewise, a sturdy mailer can protect an order while doing little to make the print feel special when the buyer opens it.

Build art print series packaging in four layers

1. Protect the printed surface

Begin with the print medium and surface. A delicate photographic surface, textured fine-art sheet, screen print, or risograph print may have different contact and abrasion concerns. If you do not know how a particular ink, coating, or paper will interact with an enclosure, ask the print producer and packaging supplier for material-specific guidance.

For collectible paper work, ask a sleeve supplier to identify the plastic rather than relying on a broad word such as “archival.” The National Archives preservation guidance says clear inert plastic enclosures made from polyester, polypropylene, or polyethylene can be used for photographic materials in stable, moderate environments. It advises against PVC-containing plastics for that application. This is conservative photographic-storage guidance, not a universal certification for every art print or sleeve product. Print File likewise distinguishes polyester, polypropylene, and polyethylene and advises avoiding PVC for photographic storage.

A sleeve should fit without forcing the print or leaving so much space that the sheet slides around. Test the opening, flap, seams, and closure position. Adhesive should not touch the artwork when the package is closed or opened. If the work is particularly valuable, fragile, heavily textured, or intended for long-term storage, seek conservation advice rather than assuming a retail sleeve is sufficient.

2. Add rigidity and edge control

A backing board helps keep an unframed print flat during handling and gives the buyer a firm surface to lift from the package. It becomes especially useful when the paper is light, the format has vulnerable corners, the print will be displayed at a market, or the order will be shipped flat.

Ask for the board’s actual composition. “Acid-free” and “lignin-free” are not interchangeable descriptions; an acid-free paper or board is not necessarily lignin-free. For long-term direct-contact use, obtain product documentation appropriate to the print and its expected storage conditions.

Size the board to support the sheet without creating an awkward border inside the sleeve. If buyers may leave the print packaged for some time, consider placing care information behind the board or in a separate pocket so it does not sit against the printed face.

3. Give the collection a visual identity

The packaging should make separate artworks feel like one release. Use a fixed type system, consistent label placement, a restrained color palette, and one recurring paper or finish. Then reserve variable fields for the artwork title, print number, edition size, colorway, or SKU.

Consistency does not require every component to be elaborate. A one-color belly band and a small rear label can create a stronger series identity than several decorative pieces competing for attention. Paper selection can also carry the design: thickness, color, texture, finish, embossing, and special properties all affect how a packaging piece behaves and looks.

4. Complete the buyer handoff

Include one insert that helps the recipient understand, care for, or reconnect with the work. That might be a combined thank-you and care card, a studio card with a collection URL, or a certificate for a signed limited edition.

A certificate can document the artist, artwork title, medium, dimensions, edition details, completion date, and signature. It should record what the work is, not suggest guaranteed scarcity, resale value, or investment performance.

Choose each component by its job

Component Main job Best use Production caution
Clear sleeve Surface and handling protection Unframed prints sold or stored individually Verify material, fit, seams, flap, and adhesive position
Backing board Rigidity and edge support Flat prints vulnerable to bending or corner damage Check actual board composition instead of relying on “acid-free” alone
Belly band Collection identity and restrained presentation Sets that need a removable title or campaign layer Wrap the protected assembly, not the bare artwork
Sticker seal or label Closure, identity, inventory, or edition information Small branded details and repeatable fulfillment Match the face material and adhesive to the application
Thank-you or care card Buyer guidance and studio connection Gift orders, limited releases, and online fulfillment Keep it useful, compact, and away from delicate print surfaces
Outer mailer or box Transit protection Any print entering a shipping network Measure the complete packaged unit before choosing the format

Use belly bands and labels without risking the artwork

A belly band works best around the sleeve-and-backer assembly, a protective folder, or another intermediary layer. Avoid tightening a band directly around an exposed print. The band should slide off cleanly without scraping the surface, bending the sheet, or catching a deckled edge.

Useful information for a front band includes the collection name, artist name, and a short series descriptor. Place detailed fields such as title, edition number, SKU, barcode, or fulfillment notes on the rear or on a separate inventory label. This keeps the front visually calm while preserving operational clarity.

A sticker seal can replace a belly band when all you need is a light closure or brand detail. It does not provide the same wraparound canvas for storytelling, and it should not be treated as structural protection. For coordinated packaging, you can order custom sticker seals and labels in shapes and finishes that support the collection’s design language.

Adhesive selection depends on both the label face material and the surface to which it will be applied. Test labels on the actual sleeve, band, folder, or mailer—not just on a generic sample. A removable presentation seal and a permanent shipping or inventory label have different jobs and may require different constructions.

If labels are becoming a larger part of the brand system, this overview of how custom stickers and labels support packaging offers additional context. Keep customer-facing labels visually distinct from carrier labels, routing marks, and warehouse identifiers.

Design inserts that earn their space

A small print package can quickly become overfilled. Rather than adding a separate card for every message, combine related information. One well-designed card can include a thank-you note on the front and handling, framing, or studio information on the back.

  • Thank-you card: acknowledge the order or gift and reinforce the studio voice.
  • Care note: explain handling, display, moisture, sunlight, or framing considerations appropriate to the specific print.
  • Collection card: introduce the theme and show how the artwork fits the wider series.
  • Certificate: document factual edition and artwork details for signed or limited work.
  • Preview invitation: direct the buyer to the next release, exhibition, or collection page.

Avoid loose pieces that can move across a delicate surface. Place inserts behind the backing board, inside a separate pocket, or in a position where opening the package feels deliberate. If an insert is not useful to the buyer or necessary to fulfillment, leave it out.

Prepare bands, cards, and labels for print

Use the printer’s template and job-specific specifications for every component. Adobe defines bleed as artwork extending beyond the trim or crop area to account for trimming variation. Its Illustrator guidance gives a general press-bleed recommendation of at least 18 points, or 0.25 inch, while also telling designers to follow the print shop’s requirements for the particular job.

That last instruction matters most. A belly band, rectangular card, kiss-cut sticker, and die-cut label may use different templates and production tolerances. Confirm the dieline, bleed, safe area, fold or score position, color mode, image resolution, fonts, and variable-data setup with the producer before submitting files.

If coordinating several components feels complicated, use a written specification sheet and follow a consistent custom-print ordering process. Record each piece’s finished size, material, quantity, artwork version, finish, and intended position in the assembly.

Worked example: a signed small-format series shipped flat

Imagine a collection of signed prints sold one at a time. Each print goes into a specified clear sleeve with a fitted backing board. A narrow exterior band carries the collection and artist names. A rear label identifies the artwork title, edition details, and internal SKU. A combined care and thank-you card sits behind the backing board.

The entire presentation assembly is then measured at its widest, tallest, and thickest points. Those finished dimensions—not the nominal print size—guide the choice of rigid outer mailer or box. Add any separate transit materials required to limit movement and protect corners, then test the packed order as a complete system.

For a multi-print gift set, the same visual structure can be retained while the protective format changes. Several individually sleeved prints might sit inside a folder or presentation enclosure before entering the shipping package. The goal is consistent identity without creating unnecessary bulk or allowing the prints to rub against one another.

Prototype one complete unit before ordering quantity

A digital mockup cannot reveal every fit, opening, and fulfillment issue. Build one physical unit using the intended print, sleeve, board, band, label, insert, and outer mailer. Then evaluate the complete sequence from assembly to unboxing.

  • Confirm that the print enters and leaves the sleeve without catching.
  • Check that no adhesive can contact the artwork.
  • Hold the package upright and verify that the print does not slide excessively.
  • Inspect corners, seams, bands, and folds for pressure points.
  • Make sure labels scan or read clearly where required.
  • Open the package as a buyer would and note any awkward steps.
  • Measure the final width, height, and thickness with every component included.
  • Place the unit in its intended mailer and check movement, flatness, and removal.
  • Photograph the approved assembly so future packing stays consistent.
  • Record the component names, specifications, suppliers, and reorder quantities.

A practical final recommendation

For most small releases, start with the least complicated system that protects the work and identifies the collection: a specified sleeve, suitable backing board, one removable branding element, and one useful insert. Add more pieces only when they improve handling, communication, gifting, or fulfillment.

Your next step is to assemble one finished prototype and measure it before ordering production quantities. When the print, presentation layer, and shipping layer work together, the series will feel polished without becoming difficult to pack, store, or reproduce.

References

  1. Photographs | National Archives
  2. FAQ – Frequently Asked Questions • Print File Archival Storage
  3. Papers | Special Papers
  4. Adhesives | Avery Dennison | LPM
  5. How to add printer’s marks and bleeds in Illustrator | Illustrator