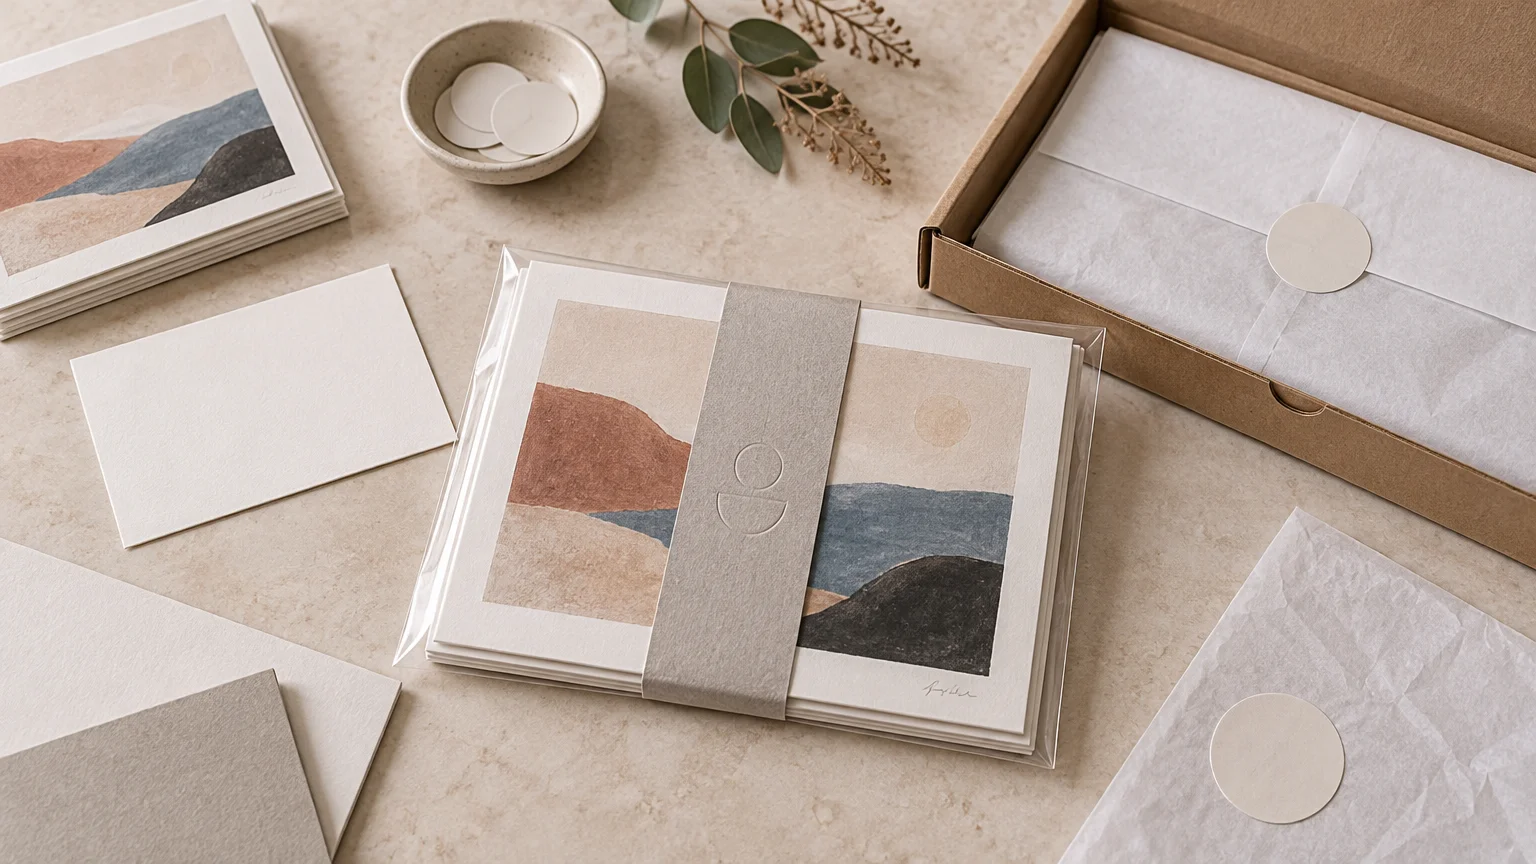
TLDR: A reliable art print series packaging system starts with a correctly sized clear sleeve, a rigid backing board, a restrained collection identifier, and one useful insert. Treat those pieces as the presentation layer, then place the completed assembly inside shipping protection suited to the order. Prototype one finished unit before buying sleeves, boards, bands, labels, or mailers in quantity.
Good art print series packaging should make the collection feel intentional without putting decoration ahead of protection. For most unframed prints, the best sequence is simple: protect the printed surface, keep the sheet flat, identify the artwork clearly, provide useful buyer information, and then prepare the complete unit for gifting or transit.
The key is to design the package as a system rather than collect attractive components one at a time. A beautiful belly band is not useful if it bows the print. A clear sleeve is not enough for postal handling. An oversized thank-you card can make an otherwise elegant package feel crowded. Every layer needs a defined job.
Separate presentation, protection, and shipping
An art print package performs three related but different functions. Presentation packaging creates the first impression. Protective packaging limits handling, surface contact, bent corners, and movement. Shipping packaging helps the complete unit withstand fulfillment and transit.
A belly band, title label, sticker seal, or thank-you card belongs mainly to the presentation layer. A sleeve and backing board protect the print during storage and handling. A rigid outer mailer, appropriately packed box, or another suitable transit enclosure forms the shipping layer.
Do not ask one component to perform all three jobs. A decorative sleeve may look finished, but it does not necessarily provide enough rigidity for shipping. Likewise, a sturdy mailer can protect an order while doing little to make the print feel special when the buyer opens it.
Build art print series packaging in four layers
1. Protect the printed surface
Begin with the print medium and surface. A delicate photographic surface, textured fine-art sheet, screen print, or risograph print may have different contact and abrasion concerns. If you do not know how a particular ink, coating, or paper will interact with an enclosure, ask the print producer and packaging supplier for material-specific guidance.
For collectible paper work, ask a sleeve supplier to identify the plastic rather than relying on a broad word such as “archival.” The National Archives preservation guidance says clear inert plastic enclosures made from polyester, polypropylene, or polyethylene can be used for photographic materials in stable, moderate environments. It advises against PVC-containing plastics for that application. This is conservative photographic-storage guidance, not a universal certification for every art print or sleeve product. Print File likewise distinguishes polyester, polypropylene, and polyethylene and advises avoiding PVC for photographic storage.
A sleeve should fit without forcing the print or leaving so much space that the sheet slides around. Test the opening, flap, seams, and closure position. Adhesive should not touch the artwork when the package is closed or opened. If the work is particularly valuable, fragile, heavily textured, or intended for long-term storage, seek conservation advice rather than assuming a retail sleeve is sufficient.
2. Add rigidity and edge control
A backing board helps keep an unframed print flat during handling and gives the buyer a firm surface to lift from the package. It becomes especially useful when the paper is light, the format has vulnerable corners, the print will be displayed at a market, or the order will be shipped flat.
Ask for the board’s actual composition. “Acid-free” and “lignin-free” are not interchangeable descriptions; an acid-free paper or board is not necessarily lignin-free. For long-term direct-contact use, obtain product documentation appropriate to the print and its expected storage conditions.
Size the board to support the sheet without creating an awkward border inside the sleeve. If buyers may leave the print packaged for some time, consider placing care information behind the board or in a separate pocket so it does not sit against the printed face.
3. Give the collection a visual identity
The packaging should make separate artworks feel like one release. Use a fixed type system, consistent label placement, a restrained color palette, and one recurring paper or finish. Then reserve variable fields for the artwork title, print number, edition size, colorway, or SKU.
Consistency does not require every component to be elaborate. A one-color belly band and a small rear label can create a stronger series identity than several decorative pieces competing for attention. Paper selection can also carry the design: thickness, color, texture, finish, embossing, and special properties all affect how a packaging piece behaves and looks.
4. Complete the buyer handoff
Include one insert that helps the recipient understand, care for, or reconnect with the work. That might be a combined thank-you and care card, a studio card with a collection URL, or a certificate for a signed limited edition.
A certificate can document the artist, artwork title, medium, dimensions, edition details, completion date, and signature. It should record what the work is, not suggest guaranteed scarcity, resale value, or investment performance.
Choose each component by its job
| Component | Main job | Best use | Production caution |
|---|---|---|---|
| Clear sleeve | Surface and handling protection | Unframed prints sold or stored individually | Verify material, fit, seams, flap, and adhesive position |
| Backing board | Rigidity and edge support | Flat prints vulnerable to bending or corner damage | Check actual board composition instead of relying on “acid-free” alone |
| Belly band | Collection identity and restrained presentation | Sets that need a removable title or campaign layer | Wrap the protected assembly, not the bare artwork |
| Sticker seal or label | Closure, identity, inventory, or edition information | Small branded details and repeatable fulfillment | Match the face material and adhesive to the application |
| Thank-you or care card | Buyer guidance and studio connection | Gift orders, limited releases, and online fulfillment | Keep it useful, compact, and away from delicate print surfaces |
| Outer mailer or box | Transit protection | Any print entering a shipping network | Measure the complete packaged unit before choosing the format |
Use belly bands and labels without risking the artwork
A belly band works best around the sleeve-and-backer assembly, a protective folder, or another intermediary layer. Avoid tightening a band directly around an exposed print. The band should slide off cleanly without scraping the surface, bending the sheet, or catching a deckled edge.
Useful information for a front band includes the collection name, artist name, and a short series descriptor. Place detailed fields such as title, edition number, SKU, barcode, or fulfillment notes on the rear or on a separate inventory label. This keeps the front visually calm while preserving operational clarity.
A sticker seal can replace a belly band when all you need is a light closure or brand detail. It does not provide the same wraparound canvas for storytelling, and it should not be treated as structural protection. For coordinated packaging, you can order custom sticker seals and labels in shapes and finishes that support the collection’s design language.
Adhesive selection depends on both the label face material and the surface to which it will be applied. Test labels on the actual sleeve, band, folder, or mailer—not just on a generic sample. A removable presentation seal and a permanent shipping or inventory label have different jobs and may require different constructions.
If labels are becoming a larger part of the brand system, this overview of how custom stickers and labels support packaging offers additional context. Keep customer-facing labels visually distinct from carrier labels, routing marks, and warehouse identifiers.
Design inserts that earn their space
A small print package can quickly become overfilled. Rather than adding a separate card for every message, combine related information. One well-designed card can include a thank-you note on the front and handling, framing, or studio information on the back.
- Thank-you card: acknowledge the order or gift and reinforce the studio voice.
- Care note: explain handling, display, moisture, sunlight, or framing considerations appropriate to the specific print.
- Collection card: introduce the theme and show how the artwork fits the wider series.
- Certificate: document factual edition and artwork details for signed or limited work.
- Preview invitation: direct the buyer to the next release, exhibition, or collection page.
Avoid loose pieces that can move across a delicate surface. Place inserts behind the backing board, inside a separate pocket, or in a position where opening the package feels deliberate. If an insert is not useful to the buyer or necessary to fulfillment, leave it out.
Prepare bands, cards, and labels for print
Use the printer’s template and job-specific specifications for every component. Adobe defines bleed as artwork extending beyond the trim or crop area to account for trimming variation. Its Illustrator guidance gives a general press-bleed recommendation of at least 18 points, or 0.25 inch, while also telling designers to follow the print shop’s requirements for the particular job.
That last instruction matters most. A belly band, rectangular card, kiss-cut sticker, and die-cut label may use different templates and production tolerances. Confirm the dieline, bleed, safe area, fold or score position, color mode, image resolution, fonts, and variable-data setup with the producer before submitting files.
If coordinating several components feels complicated, use a written specification sheet and follow a consistent custom-print ordering process. Record each piece’s finished size, material, quantity, artwork version, finish, and intended position in the assembly.
Worked example: a signed small-format series shipped flat
Imagine a collection of signed prints sold one at a time. Each print goes into a specified clear sleeve with a fitted backing board. A narrow exterior band carries the collection and artist names. A rear label identifies the artwork title, edition details, and internal SKU. A combined care and thank-you card sits behind the backing board.
The entire presentation assembly is then measured at its widest, tallest, and thickest points. Those finished dimensions—not the nominal print size—guide the choice of rigid outer mailer or box. Add any separate transit materials required to limit movement and protect corners, then test the packed order as a complete system.
For a multi-print gift set, the same visual structure can be retained while the protective format changes. Several individually sleeved prints might sit inside a folder or presentation enclosure before entering the shipping package. The goal is consistent identity without creating unnecessary bulk or allowing the prints to rub against one another.
Prototype one complete unit before ordering quantity
A digital mockup cannot reveal every fit, opening, and fulfillment issue. Build one physical unit using the intended print, sleeve, board, band, label, insert, and outer mailer. Then evaluate the complete sequence from assembly to unboxing.
- Confirm that the print enters and leaves the sleeve without catching.
- Check that no adhesive can contact the artwork.
- Hold the package upright and verify that the print does not slide excessively.
- Inspect corners, seams, bands, and folds for pressure points.
- Make sure labels scan or read clearly where required.
- Open the package as a buyer would and note any awkward steps.
- Measure the final width, height, and thickness with every component included.
- Place the unit in its intended mailer and check movement, flatness, and removal.
- Photograph the approved assembly so future packing stays consistent.
- Record the component names, specifications, suppliers, and reorder quantities.
A practical final recommendation
For most small releases, start with the least complicated system that protects the work and identifies the collection: a specified sleeve, suitable backing board, one removable branding element, and one useful insert. Add more pieces only when they improve handling, communication, gifting, or fulfillment.
Your next step is to assemble one finished prototype and measure it before ordering production quantities. When the print, presentation layer, and shipping layer work together, the series will feel polished without becoming difficult to pack, store, or reproduce.