Posted on

How Many Lands Should Your MTG Commander Deck Run?

“How many lands should your MTG Commander deck run?” sounds like it should have one clean answer. It does not. Commander is a four-player format with 99 cards plus a commander, and Wizards still describes it as roughly 20 minutes per player, which means your deck needs to function through a longer, swingier game than a 60-card deck usually does. That alone makes land counts harder to fake.

The bad answer is “37, always.” The better answer is that most normal Commander decks should start somewhere in the high 30s, then move up or down based on curve, colors, ramp, and how much your commander costs. EDHREC’s current building guide recommends starting around 36 to 38 lands and going a little higher if your commander costs five or more. Culture of Gaming’s newer mana-base guide starts a little higher, at around 38 to 40 for typical casual Commander decks, while another EDHREC mulligan piece says the author rarely goes below 36 and prefers 38-plus lands. Put those together, and the honest baseline is that most casual Commander decks belong somewhere around 37 to 39 lands, with 38 being a very safe default.

That is not exciting advice, but it is good advice. A lot of Commander mana problems are not really “mana base problems.” They are land-count problems wearing a disguise. If you start too low, every other part of your deck gets worse. Your ramp becomes harder to cast, your opening hands get riskier, and your commander tax starts feeling like a personal attack instead of a known part of the format.

Start with your curve, not your ego

The cleanest way to pick a land count is to ask when your deck actually needs to start working. Culture of Gaming’s mana-base article puts it nicely: if your deck needs to reliably cast a three-mana commander or start chaining two- and three-mana plays, you want to hit three lands naturally most games. If your plan really starts at five or six mana, you want to keep making land drops through turn five, not just “eventually.” That sounds obvious, but a shocking number of Commander decks are built like they want to start playing on turn three and sleeved like they are okay waiting until turn five.

So if your deck is full of early setup, cheap interaction, or a commander you want to cast on curve, start higher than your pride wants to. A lean land count only works when the whole deck is built to support it. It does not work because you read a list online and liked how disciplined 34 looked in the deck editor. 34 looks disciplined right up until your opening hand is two four-drops, one tapland, and a small crisis.

When you should play more lands

The easiest time to add lands is when your commander is expensive. EDHREC’s deckbuilding guide says this directly: if your commander costs five or more, you should lean heavier on lands. That makes sense, because your deck is not just trying to cast its spells once. In Commander, you should assume your commander may need to be cast again, which means the practical cost of your deck’s centerpiece is often higher than the printed mana value.

You also want more lands if your deck is three or more colors, if your mana base uses a lot of lands that enter tapped, or if you are spending a bunch of land slots on utility lands that do not help cast your spells. Culture of Gaming calls out this exact trap: utility lands are great until your opening hand is two utility lands and a dream. That is funny once. After that it becomes deckbuilding feedback.

Big-mana decks should obviously go up as well. If your list is built to ramp into haymakers, then part of that job is simply hitting normal land drops. Ramp supports land drops. It does not replace them. That point shows up in both Culture of Gaming’s mana-base piece and EDHREC’s broader land-count discussion, and it is one of the most common Commander mistakes people still make.

When you can trim lands

You can trim lands when the deck is genuinely low to the ground and actually built that way. Culture of Gaming explicitly says very low-curve, high-cheap-ramp lists can shave below the 38-to-40 casual baseline. EDHREC’s build guide also gives you room to start closer to 36 if the deck is streamlined and your commander is not expensive. The key word there is “streamlined.” Not “optimistic.” Streamlined.

That usually means your deck has a low curve, plenty of cheap card draw, and enough early ramp that your first few turns are still productive if you miss a natural land somewhere later. It also means your colored mana is clean enough that your lands and cheap rocks actually cast each other. If your deck is low land, high greed, and full of awkward color requirements, you are not being efficient. You are just scheduling your bad draws in advance. PrintingProxies

A practical Commander land-count baseline

If you want the simple version, this is the baseline I would use.

For a typical casual two-color or three-color Commander deck, start at 38 lands and adjust after real games.

Go to 39 or 40 if your commander costs five or more, your curve is heavy, or your mana base is slower.

Drop toward 36 or 37 only if your deck is truly lower curve, has strong cheap ramp, and consistently functions in testing.

That recommendation is not pulled from the air. It is basically where current Commander advice keeps clustering once you line up Wizards’ rules context, EDHREC’s building advice, and Culture of Gaming’s more practical “stop lying about your deck” curve test.

Test the deck, not the theory

The best answer is still the one your deck gives you after a few games.

Culture of Gaming’s deck-testing workflow suggests running a batch of opening hands and asking whether your mana cooperated and whether you advanced your plan by turn three or four. That is a good sanity check because it gets you out of theory mode fast. If you consistently keep hands that only work if you draw one land in the next two turns, your land count is probably too low or your mana is too cute. Either way, the deck is telling you something.

That is why land count is not really a badge of honor. It is a functional setting. The correct number is the one that lets your deck be the deck it claims it is.

Final thoughts

So, how many lands should your MTG Commander deck run?

For most casual decks, the honest answer is probably 38. Not because 38 is sacred, but because current Commander advice keeps converging on the high 30s unless your deck is either very streamlined or very top-heavy. Start there, move up if your deck is slow or expensive, move down only if your list has truly earned it, and stop treating “fewer lands” like a personality trait.

Posted on

MTG Radiation: How Rad Counters Work (Fallout Mechanic Explained)

TLDR

  • MTG Radiation uses rad counters placed on players, not permanents.
  • At the start of your precombat main phase, rad counters make you mill that many cards.
  • For each nonland you mill this way, you lose 1 life and remove 1 rad counter.
  • Lands are the awkward part: they get milled, but they do not remove rad counters.

You know that warm, cozy feeling of shuffling up Commander and thinking, “Nothing bad can happen before I even cast a spell”? MTG Radiation exists to fix that. It is a Fallout-flavored mechanic that turns your own library into a slow-motion liability and politely asks if you would like to mill, take damage, and maybe enable your graveyard deck all at once.

How MTG Radiation Works

Radiation shows up as rad counters, which are counters players get. They stick around until something tells you to remove them. They do not wear off at end step like a reasonable debuff.

Here’s the core loop:

  1. Beginning of your precombat main phase: If you have rad counters, you mill a number of cards equal to your rad counters.
  2. Then you check what you milled:
    • For each nonland card milled this way, you lose 1 life and remove 1 rad counter.
    • Lands get milled too, but they do not reduce your radiation level.

This is why rad counters feel “self-cleaning,” but only if your deck keeps cooperating and flipping nonlands. If you hit lands, the rads hang around like a houseguest who “just needs one more night.”

A Quick Example (Because Numbers Calm People Down)

You have 5 rad counters.

  • You mill 5 cards.
  • Let’s say you mill 3 nonlands and 2 lands.
  • Result: you lose 3 life and remove 3 rad counters, leaving you with 2 rad counters for next turn.

Next precombat main phase, you mill 2. And so on, until you either stabilize… or your deck keeps serving you lands like it is trying to be funny.

How to Play With (or Against) Radiation

Think of rad counters as a clock with mood swings:

  • If you’re giving rads: you want to stack counters fast and punish the table for trying to ignore them. Proliferate is especially rude here because it can add counters to players who already have them.
  • If you’re taking rads: treat your life total like it is a resource you would like to keep. Also, remember the upside: you are filling your graveyard, which means recursion and reanimation decks sometimes pretend Radiation is “value” (they are lying, but it is useful).

FAQs

Do rad counters go away on their own?
Only partially. You remove rad counters when you mill nonlands from the rad trigger, or when another effect explicitly removes them.

Can I die to Radiation before I do anything?
Yes. The rad trigger happens at the beginning of your precombat main phase, so you can absolutely get irradiated into the floor before casting a spell.

Do I lose instantly if I mill my whole library?
Not from milling itself. Milling empties your library, but you usually lose when you later have to draw from an empty library.

Posted on

MTG Proxies: How Do I Ask My Playgroup If Proxies Are Okay?

Ask before the game starts, frame it around fun + clarity, and pair it with a quick power-level check. Offer a simple option (clearly marked proxies, custom backs, or a backup non-proxy deck). If someone isn’t comfortable, don’t litigate it—either compromise or swap decks.

Why this question matters (and why “surprise proxies” feels weird)

Most proxy disagreements aren’t really about cardboard. They’re about expectations.

  • Some players hear “proxies” and think “counterfeits,” which triggers trust concerns.
  • Some hear “proxies” and think “fully optimized deck with every staple,” which triggers power-level concerns.
  • Some are fine with proxies in theory, but hate unreadable or confusing proxies in practice.

If you ask cleanly and early, you dodge 90% of the awkwardness.


Ask early, but don’t make it a courtroom opening statement

The best timing is during the pregame shuffle / Rule 0 chat, not after you’ve presented your commander and everyone’s already mentally committed.

A good opener is short and normal:

“Quick heads-up: I’m running a few proxies in this deck. Is everyone cool with that?”

Then immediately add the two things people actually care about:

  1. They’re readable / clearly proxies
  2. The deck’s power matches the table

Use the “two-sentence” proxy disclosure

This is my favorite because it respects everyone’s time:

“I’ve got a few Magic proxies in here—nothing trying to pass as real cards. Power-wise it’s around a 6–7: some synergy, no fast mana, no turn-3 combos.”

If your deck does have fast mana, tutors, infinite combos, or “oops I win” lines—say so. Proxies aren’t the issue; surprise lethality is.


Clarify what you mean by “proxy” (without getting preachy)

Sometimes the word itself is the problem. A simple clarification helps:

“Just playtest prints—clearly not real cards. I’m using them to test / avoid risking expensive cards.”

If someone’s cautious, you can add:

“Happy to show any card that looks questionable, and I can swap decks if you’d rather.”

The vibe you want is “transparent and flexible,” not “I am here to win an ethics debate.”


Scripts for common situations

1) Long-time home playgroup (easy mode)

“I swapped in a couple proxies—mostly mana base upgrades so the deck functions. Cool?”

If you’re close with them, you can also ask what their boundary is:

“Do you guys have a proxy limit you prefer?”

2) LGS pickup pod (where misunderstandings happen)

“Before we start—any proxy preferences here? I’ve got about 10 proxies, all clearly marked.”

Follow with a quick power check:

“Deck is mid-power, no infinite combos.”

This signals you’re not trying to sneak a cEDH list into Precon Night.

3) Online / SpellTable (readability matters more)

“I’ve got some proxies—print-quality and readable on camera. If anything isn’t clear, I’ll read it and show the text.”

Online, the real sin is a proxy that becomes “mystery rectangle” on webcam.

4) New group / first time playing together

“I’m new to the group—what’s your proxy comfort level? I can play a no-proxy deck if that’s the preference.”

This flips the dynamic: you’re not asking permission as a beggar; you’re asking for the house standard like a normal human.


What to say if someone says “I’d rather not”

Don’t argue. Don’t “well actually.” Don’t do the thing where you explain the entire economics of Magic.

Just be smooth:

“Totally fair—thanks for saying so. I’ve got another deck I can swap to.”

If you don’t have a backup deck, offer a simple compromise:

  • “I can pull the proxies and replace with basics / budget alternatives.”
  • “I can switch decks next game.”
  • “Want me to swap out the proxied staples specifically?”

Even if the answer is no, this keeps the table energy good.


A simple compromise menu (so nobody has to invent one)

If your group is “maybe,” offer one of these:

  • Clearly marked proxies (back says “PROXY” or custom back)
  • Proxy cap (ex: up to 10–15 per deck)
  • Proxy only expensive staples (mana base, reserved list, etc.)
  • Proxy only if you own a copy (common house rule, not required)
  • Full-deck proxies allowed, but match power level (surprisingly common)

The point is: make it easy to say yes without feeling like they just agreed to chaos.


Make your proxies easy to play against

If you want proxies to be welcomed, optimize for the opponent:

  • Readable text at arm’s length
  • Correct oracle wording (or at least correct rules text)
  • Consistent formatting so people can scan the board state
  • No “gotcha” ambiguity (especially for double-faced cards)

If you’re printing proxies for regular play, using a consistent, high-quality source helps a lot—less “is that a Sharpie’d Plains?” and more “cool, that’s clearly a proxy but I can read it.” If you want that style of clean, readable prints, you can point people to ProxyMTG.com as an example of print-on-demand proxies that are made to be played with (not passed off as real).


The “don’t make it weird” checklist

If you’re nervous, run this quick mental list:

  • Am I asking before the game starts?
  • Did I say the proxies are clearly proxies?
  • Did I do a power-level check too?
  • Do I have a backup plan if someone isn’t comfortable?

If yes, you’re good.


Bottom line

Asking your playgroup about MTG proxies isn’t a confession. It’s just Rule 0: align expectations so everyone has a fun game. Keep it short, keep it honest, keep it readable, and be willing to swap if needed. That’s it. No proxy dissertation required.

Posted on

A Comprehensive Guide to Securing Investors for Your Business Blog

Starting a business blog can be an exciting venture, but securing the necessary funds to get it off the ground can be a daunting task. However, with the right approach and strategy, attracting investors to support your business blog is achievable. In this article, we’ll delve into a detailed guide on how to effectively secure investors for your business blog, covering essential steps and considerations along the way.

Define Your Business Blog Concept

Before seeking investors, it’s crucial to have a clear vision and concept for your business blog. Define your niche, target audience, content strategy, and unique value proposition. Investors want to see a compelling idea with a strong potential for growth and profitability.

Develop a Solid Business Plan

Craft a comprehensive business plan outlining your blog’s objectives, monetization strategy, revenue projections, marketing plan, and growth milestones. Your business plan should demonstrate a thorough understanding of your market, competitors, and potential challenges.

Build a Professional Online Presence

Establishing a professional online presence is essential for attracting investors. Invest in creating a polished website that showcases your blog’s concept, content, and value proposition. Leverage social media platforms to engage with your target audience and build credibility within your industry.

Bootstrap Initial Operations

Consider bootstrapping your blog’s initial operations to demonstrate viability and attract investors. Launch your blog with minimal resources, focusing on creating high-quality content and building an engaged audience. This early traction will make your blog more attractive to potential investors.

Network with Potential Investors

Networking plays a crucial role in securing investors for your business blog. Attend industry events, conferences, and networking forums to connect with potential investors. Utilize online platforms such as LinkedIn to identify and reach out to investors who have shown interest in similar ventures.

Prepare a Compelling Pitch Deck

Create a compelling pitch deck that highlights the key aspects of your business blog, including the problem you’re solving, your solution, market opportunity, competitive advantage, monetization strategy, and financial projections. Keep your pitch concise, engaging, and visually appealing to capture investors’ attention.

Seek Angel Investors and Venture Capitalists

Explore opportunities to pitch your business blog to angel investors and venture capitalists who specialize in funding early-stage startups. Research angel investor networks, seed funds, and venture capital firms that have a track record of investing in media and content-driven ventures.

Leverage Crowdfunding Platforms

Consider leveraging crowdfunding platforms such as Kickstarter, Indiegogo, or Patreon to raise funds for your business blog. These platforms allow you to showcase your concept to a wider audience and secure funding from individual backers who believe in your vision.

Be Transparent and Responsive

Transparency and responsiveness are key when interacting with potential investors. Be prepared to answer their questions, address their concerns, and provide regular updates on your blog’s progress. Building trust and credibility with investors is essential for securing funding.

Negotiate Terms and Close the Deal

Once you’ve attracted investor interest, negotiate terms that are favorable for both parties. Be prepared to discuss equity stakes, valuation, investor rights, and exit strategies. Work with legal advisors to ensure that the investment terms are fair and legally binding.

Conclusion

Securing investors for your business blog requires careful planning, strategic execution, and relentless persistence. By defining your concept, developing a solid business plan, building a professional online presence, networking with potential investors, and leveraging various funding sources, you can increase your chances of attracting the investment needed to fuel the growth of your business blog. Stay focused on delivering value to your audience and investors, and you’ll be well on your way to building a successful and sustainable business blog.

Posted on

Top 10 Easiest Small Businesses with Low-Cost Startup

Starting a small business doesn’t always require a massive investment. Many entrepreneurs have successfully launched businesses with minimal capital, proving that a low budget doesn’t mean low potential. In this article, we will explore the top 10 easiest small businesses with a low-cost startup, providing aspiring business owners with viable options to kickstart their entrepreneurial journey.

Freelance Services: Description: Offering freelance services in areas such as writing, graphic design, web development, or social media management requires minimal upfront costs. Freelancers can use online platforms to find clients and build a portfolio, making it an accessible option for many.

Online Retail: Description: With the rise of e-commerce platforms, starting an online retail business is more accessible than ever. Selling niche products through platforms like Etsy or Shopify allows entrepreneurs to reach a global audience with minimal initial investment.

Dropshipping: Description: Dropshipping eliminates the need for inventory management and upfront product costs. Entrepreneurs can create an online store, partner with suppliers, and only purchase products when customers make a purchase, reducing financial risks.

Digital Marketing Agency: Description: As businesses increasingly rely on digital marketing, starting a digital marketing agency can be lucrative. Entrepreneurs can offer services such as social media management, content creation, and SEO without the need for a physical office space.

Consulting Services: Description: If you have expertise in a specific industry, offering consulting services can be a low-cost business option. Entrepreneurs can provide advice and guidance to businesses or individuals, leveraging their knowledge to generate income.

Event Planning: Description: Event planning requires minimal startup costs, especially when initially focusing on small-scale events. Entrepreneurs can offer services for birthdays, weddings, or corporate gatherings, gradually expanding as their business grows.

Home Cleaning Services: Description: Providing residential cleaning services is a business that requires basic cleaning supplies and transportation. Entrepreneurs can start locally, gradually building a clientele through word of mouth and referrals.

Personal Fitness Training: Description: For fitness enthusiasts, starting a personal training business is a viable option. This business can begin with one-on-one sessions in local parks or clients’ homes, minimizing the need for a dedicated workout space.

Tutoring Services: Description: With knowledge in a specific subject, entrepreneurs can offer tutoring services to students. This business can be operated from home, eliminating the need for a physical location.

Pet Services: Description: Pet-related services, such as dog walking, pet sitting, or grooming, can be started with minimal investment. Entrepreneurs can build a client base within their local community and expand over time.

Conclusion:

Embarking on the journey of entrepreneurship doesn’t always require a significant financial commitment. The aforementioned small business ideas offer a range of opportunities for individuals with diverse skills and interests. By focusing on low-cost startup options, aspiring business owners can turn their passion into a profitable venture and carve out a niche in the competitive business landscape. Remember, success often lies in dedication, creativity, and the ability to adapt to changing market dynamics.

Posted on

The Magnetic Charm of Sticker Magnets: A Business Promotion Game-Changer

In the ever-evolving landscape of business promotion, finding unique and effective ways to leave a lasting impression on your audience is crucial. While traditional marketing tools like business cards and brochures still hold their ground, there’s a rising star that’s capturing attention and sticking around—quite literally: sticker magnets.

Sticker magnets, a fusion of two popular promotional items, offer a distinctive and memorable way for businesses to connect with their target audience. Let’s explore the magnetic charm of sticker magnets and why they might just be the game-changer your business needs.

1. Long-Lasting Visibility

One of the key advantages of sticker magnets over traditional stickers lies in their longevity. While standard stickers may find their way to a desk drawer or end up in the recycling bin, sticker magnets hold a special place—literally. Once placed on a refrigerator or any other magnetic surface, they become a constant presence in the daily lives of your customers. Every time they reach for a snack or open the fridge, your business is front and center, creating a lasting impression.

2. Functional and Decorative

Sticker magnets serve a dual purpose—they’re not just promotional items, but also functional and decorative elements. Unlike traditional stickers that may only be applied to certain surfaces, sticker magnets can be affixed to a variety of magnetic spaces, making them versatile and adaptable. Customers are more likely to keep and display something that not only represents a brand but also adds a touch of personality to their surroundings.

3. Unique Design Opportunities

The combination of stickers and magnets opens up a world of creative possibilities. Businesses can leverage this hybrid form to create eye-catching designs that stand out from the crowd. Whether it’s a quirky illustration, a clever slogan, or a unique shape, sticker magnets provide a canvas for creativity that goes beyond the limitations of traditional promotional materials.

4. Affordable and Customizable

Sticker magnets are not only effective but also budget-friendly. Businesses can order them in bulk, reducing the per-unit cost and making them an economical choice for widespread distribution. Moreover, the customizable nature of sticker magnets allows businesses to tailor their designs to suit their branding and messaging, ensuring a personalized touch that resonates with their target audience.

5. Enhanced Retention and Recall

The tactile nature of sticker magnets enhances customer retention and recall. When individuals interact with a tangible, visually appealing item like a sticker magnet regularly, it reinforces brand recognition. This physical engagement creates a stronger connection between the consumer and the business, leading to increased brand recall when they are in need of products or services offered by your company.

In conclusion, the magnetic charm of sticker magnets offers a fresh and innovative approach to business promotion. By combining the visual appeal of stickers with the practicality of magnets, businesses can create a promotional item that not only grabs attention but also maintains a consistent presence in the lives of their audience. So, if you’re looking for a promotional game-changer that sticks around, consider the powerful allure of sticker magnets.

Posted on

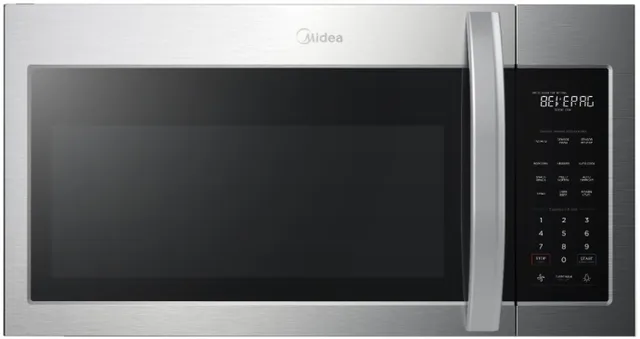
How Microwaves are Produced

Microwave ovens are common household appliances that use microwave radiation to cook and heat food quickly and efficiently. The process of making a microwave involves a series of industrial and manufacturing steps, from the design and creation of individual components to the final assembly and testing of the product. Here’s an overview of how microwaves are made:

Design and Engineering

  1. Conceptual Design: Engineers design the microwave oven’s functionality, size, power, and features, considering safety regulations and market demand.
  2. Component Design: Key components like the magnetron (which generates the microwaves), the waveguide, the cooking chamber, the turntable, and control panels are designed.
  3. Prototyping: Early models are built to test the design, electronics, and mechanics of the microwave.

Manufacturing Components

  1. Magnetron Production: The magnetron, the heart of the microwave, is produced through a precision process involving the assembly of a cathode, anode, and magnet system.
  2. Cavity and Body Manufacturing: The metal body and cooking cavity are stamped and formed from sheets of steel. This may involve cutting, bending, and welding processes.
  3. Electronic Controls: Circuit boards for the control panel are printed, assembled, and soldered with various electronic components.
  4. Door Assembly: The door, usually with a conductive mesh screen that allows viewing while containing the microwaves, is assembled with the safety interlock system.
  5. Turntable Assembly: If the design includes a turntable, it is assembled from glass or ceramic with a drive motor.

Assembly Line

  1. Body Assembly: The main body of the microwave, typically the outer shell, is assembled on the production line.
  2. Component Installation: Workers or automated systems install the magnetron, waveguide, and other high-voltage components into the body.
  3. Wiring and Electronics: The electronic control systems, including the control panel and power supply, are wired to the high-voltage components.
  4. Insulation: Insulation material is inserted to keep the heat inside the cooking chamber.
  5. Door Attachment: The door is attached to the main body, and its interlock system is connected and tested.
  6. Turntable Installation: If applicable, the turntable mechanism is installed.
  7. Labeling: Instructions and Informational product labels are installed.
  8. Final Assembly: The remaining internal components and exterior trim, like branding and decorative elements, are added.

Testing

  1. Quality Control: Each microwave is subjected to quality control tests. This can include testing the magnetron, electrical systems, and ensuring that the microwave door seals properly.
  2. Performance Testing: The microwave is tested to ensure it heats correctly and all controls work as intended.
  3. Safety Testing: Microwaves are checked for any radiation leakage and must pass safety standards.

Packaging

  1. Cleaning: The completed microwave is cleaned to remove any debris from the manufacturing process.
  2. Packaging: The microwave is packaged along with any accessories, such as the glass plate for the turntable, instruction manuals, and warranty information.
  3. Shipping: The packaged microwaves are sent to warehouses or directly to retailers.

After Sales Support

  1. User Manual and Support: Detailed user manuals are provided, and support teams are trained to assist customers with any issues.
  2. Warranty Service: Manufacturers provide a warranty service to repair or replace defective units.

Throughout the process, manufacturers are also involved in ongoing research and development to improve microwave technology, increase efficiency, reduce costs, and ensure the sustainability of production processes. Quality checks are embedded throughout the manufacturing process to ensure that the final product is safe and reliable.

Posted on

Sticker Business Cards for HVAC Companies and Appliance Repair

Introduction: The Role of Business Cards

Business cards have long been a staple in the professional world. They provide an essential touchpoint for potential clients and partners, a tangible representation of one’s professional persona. Historically, these small cards have played a massive role in business networking and growth.

The progression of business cards has been fascinating. Their origin dates back to China in the 15th century and they’ve evolved in shape, size, and function over centuries. Today, an innovative concept, sticker business cards, is making waves, offering businesses a unique way to stand out.

Advantages of Sticker Business Cards

Sticker business cards are not just your ordinary cards; they double up as stickers, offering more than just contact details. Let’s look at some of the perks.

Memory Recall

People interact with stickers in a more personal way than traditional cards. When a potential customer sticks it on their fridge or laptop, it’s a daily reminder of your business, making it more memorable.

Cost Efficiency

At first glance, sticker cards might seem pricier. However, given their dual purpose as promotional material and business card, the cost-per-impression is often lower than standard business cards.

Dual Functionality

Traditional cards often end up in a drawer, forgotten. Sticker cards, on the other hand, are functional. They can be a form of advertisement, constantly on display, thereby maximizing their reach.

Designing the Perfect Sticker Card

A good design is crucial to maximize the impact of your sticker card.

Branding and Color Schemes

It’s essential to ensure that your card aligns with your company’s branding. Cohesive color schemes, logos, and fonts create a professional image and make you easily recognizable.

Information Placement

While aesthetics are important, don’t neglect the basics. Your name, contact information, and a brief about your services should be clearly visible.

Material Choice

Given that these cards also function as stickers, it’s pivotal to select a durable material that sticks well and can withstand daily wear and tear.

Implementing Sticker Cards for HVAC and Appliance Repair

For industries like HVAC and Appliance Repair, where referrals and word-of-mouth play a huge role, sticker cards can be game-changers.

Tailoring for the Industry

Customize your sticker cards to resonate with your target audience. Perhaps, a cool air conditioner or a wrench design can add a unique touch.

Distribution Strategies

It’s not just about having the sticker cards but getting them out there. Distributing them after a successful service appointment or at local events can be effective.

Real-world Success Stories

Take Joe’s HVAC, for instance. After switching to sticker business cards, they reported a 20% increase in referral clients. Or Sarah’s Appliance Repair, who said her clients loved the innovative idea, with many of them sticking her card right on their repaired appliances for easy access!

Conclusion: Elevate Your Business with Sticker Cards

In today’s competitive world, standing out is imperative. Sticker business cards are a fresh, interactive way to engage potential clients and keep your business at the forefront of their minds. For HVAC companies and Appliance Repair businesses, it’s time to switch and witness the growth!

FAQs

  1. Are sticker business cards more expensive than traditional ones?
    • Initially, they might be, but given their dual functionality, they often provide more value in the long run.
  2. Where can I print sticker business cards?
    • Many online platforms and local printers now offer specialized sticker card printing.
  3. Can I customize the shape of my sticker card?
    • Absolutely! Custom shapes can make your card even more memorable.
  4. How do I ensure my sticker card looks professional?
    • Focus on branding, select high-quality materials, and ensure all essential information is present and legible.
  5. Is it suitable for all businesses?
    • While they offer unique advantages, it’s essential to consider if they align with your business and audience needs.
Posted on

Crafting the Perfect Home Bar with a Mini Fridge

In the realm of home entertainment, few additions can match the allure and sophistication of a well-crafted home bar. It’s a sanctuary where friends and family gather, where stories are shared, and where celebrations come to life. Creating a home bar is not just about pouring drinks; it’s about curating an experience, an ambiance that exudes warmth and hospitality. One indispensable element that can elevate your home bar to the next level is the inclusion of a mini fridge. In this article, we will explore the art of crafting a home bar and delve into the myriad benefits of adding a mini fridge to this space.

Designing Your Home Bar

Before diving into the specifics of a mini fridge, it’s important to establish the design and theme of your home bar. The style could range from a classic speakeasy, a contemporary lounge, a rustic tavern, or even a tropical paradise. The choice of design sets the tone for the entire space, influencing everything from furniture and lighting to glassware and decorations.

The Role of a Mini Fridge

A mini fridge is the unsung hero of any home bar. Here’s how it can make a significant difference:

1. Convenience: A mini fridge allows you to store beverages and mixers at the perfect temperature, ensuring that your drinks are always refreshing and ready to be served. No more running to the kitchen every time someone orders a drink; everything you need is right at your fingertips.

2. Space Optimization: Traditional refrigerators can be bulky and take up a lot of space. Mini fridges are compact and can be seamlessly integrated into the design of your bar, maximizing the use of the available space.

3. Diverse Storage: Mini fridges come with various compartments, shelves, and drawers, making it easy to organize different types of beverages, from beer and wine to soft drinks and juices. Some models even have special sections for chilling wine bottles or keeping ice cubes ready.

4. Energy Efficiency: Mini fridges are energy-efficient, designed to consume less power than their larger counterparts. This not only saves you money but also aligns with eco-friendly practices.

5. Aesthetic Appeal: Modern mini fridges come in a variety of styles and finishes, allowing you to choose one that complements the overall aesthetics of your home bar. Whether you prefer stainless steel, black, or a retro color, there’s a mini fridge to match your design theme.

Stocking Your Mini Fridge

Once you have your mini fridge in place, it’s time to stock it with a selection of beverages that cater to diverse tastes. Consider having a variety of beers, wines, and spirits, along with mixers, fresh fruits, and garnishes. Don’t forget non-alcoholic options like sparkling water, juices, and soft drinks to cater to guests who prefer non-alcoholic beverages.

Conclusion

Creating a home bar is an exciting endeavor that allows you to express your personality and hospitality. By incorporating a mini fridge into your design, you not only enhance the functionality of your bar but also add a touch of elegance and practicality. With a well-stocked and well-chilled mini fridge, your home bar will become the heart of your entertainment space, where unforgettable moments are crafted and cherished. Cheers to the art of home bar craftsmanship!

Posted on

Creating Your Dream Home Gym: Transforming Your Basement

With the increasing importance of health and wellness, having a convenient space to work out has become a priority for many. If you’re looking to skip the crowded gyms and enjoy a tailored fitness routine at your own pace, why not consider transforming your basement into a home gym? The basement provides an excellent opportunity to create a dedicated fitness haven that suits your preferences and schedule. In this article, we’ll guide you through the process of turning your basement into a functional and motivating workout space, complete with the necessary appliances and equipment.

Step 1: Planning and Preparation

Assess the Space: Take stock of your basement’s layout and dimensions. Consider the available floor space, ceiling height, and any potential obstacles that might need to be worked around.

Lighting and Ventilation: Adequate lighting and ventilation are essential for a comfortable and energizing workout environment. Consider adding windows, if possible, or incorporating bright lighting fixtures. Ventilation can be enhanced through fans or air conditioning systems.

Flooring: Choose a flooring material that is suitable for workouts, such as rubber, foam, or vinyl. This will provide cushioning, noise reduction, and protection for your equipment.

Step 2: Essential Appliances and Equipment

Mirrors: Installing mirrors along the walls can create the illusion of a larger space and help you maintain proper form during exercises.

Cardio Machines: Depending on your preferences, invest in cardio equipment like treadmills, stationary bikes, or elliptical trainers. These machines are excellent for cardiovascular workouts and burning calories.

Strength Training Equipment: Dumbbells, kettlebells, barbells, and a weight bench are essential for strength training. You can also consider resistance bands, which are versatile and space-saving.

Multi-Functional Stations: If space allows, consider incorporating multi-functional workout stations that combine various exercises. This could include a power rack with pull-up bars and attachments for squats and bench presses.

Yoga and Stretching Area: Dedicate a corner for yoga mats, stability balls, foam rollers, and any other accessories that aid in stretching and flexibility exercises.

Step 3: Setting the Ambiance

Colors and Decor: Choose motivating colors that energize you. Consider vibrant tones that reflect your fitness goals. Inspirational quotes or artwork can also enhance the ambiance.

Sound System: Music is a great motivator during workouts. Install a sound system with good speakers so you can enjoy your favorite tunes while exercising.

Temperature Control: Ensure your basement gym is comfortable year-round. Depending on your climate, you might need space heaters for the winter or fans for the summer.

Step 4: Safety First

Emergency Equipment: Keep a first aid kit and emergency contact information handy in case of any accidents or injuries.

Proper Ventilation: Adequate airflow is crucial to prevent the buildup of odors and to maintain air quality, especially in a basement environment.

Step 5: Organizing and Maintenance

Storage Solutions: Install shelves, cabinets, or storage racks to keep your equipment organized and easily accessible.

Regular Cleaning: Regularly clean and disinfect your gym equipment and space to maintain hygiene and prolong the life of your appliances.

Conclusion

Transforming your basement into a home gym is an exciting project that can lead to a healthier and more active lifestyle. By carefully planning the layout, investing in essential appliances and equipment, and creating a motivating atmosphere, you’ll have a functional and inviting space to work out at your convenience. Remember that your home gym should reflect your fitness goals and preferences, making it a space where you can truly enjoy your workouts and achieve your wellness aspirations.